How to use Azure Container Registry?
14.04.2022
We will try to take a closer look at the development from Microsoft, namely Azure container registry, and see why it can be the best solution for your development team.
Management of services and applications without hassle is a dream of every engineer. But which technology is the best for this challenge? In this article we will try to take a closer look at the development from Microsoft, namely Azure container registry, and see why it can be the best solution for your development team.
Let’s start from Azure itself. Namely, it’s an infrastructure that allows developers to act with different services and build almost any features for their products from scratch. Messaging services, mass transit, work with Rabbit or Kafka – Azure allows you to handle various tasks almost on your own without involving a lot of people to these processes.
As for containers, the usual starting point for playing with Azure is mastering Docker. It’s a platform for building, running, and shipping applications into containers or, in other words, “standardized executable components combining application source code with the operating system (OS) libraries and dependencies required to run that code in any environment”.
Why do you need Docker?
Long time ago, in pre-containers era, a typical development process looked like a labor-intensive set of processes where you needed virtual machines, knowledge about how to create and run a server, and understanding totally different types of frameworks. In common practise teams were using Windows machines or Linux systems which impacted the cost value.
The concept of Docker appeared to streamline the whole process. Today, with the help of this platform you can build any application in a separate layer and ship it with all components to different platforms regardless of their operational systems in the form of a container. The isolation and security allow you to run many containers simultaneously on a given host. Containers are lightweight and contain everything needed to run the application. Figurally, it acts as a smart box for containers giving you an opportunity to ship complete applications to any person.
With Docker, you can manage your infrastructure in the same ways you manage your applications. By taking advantage of Docker’s methodologies for shipping, testing, and deploying code quickly, you can significantly reduce the delay between writing code and running it in production.
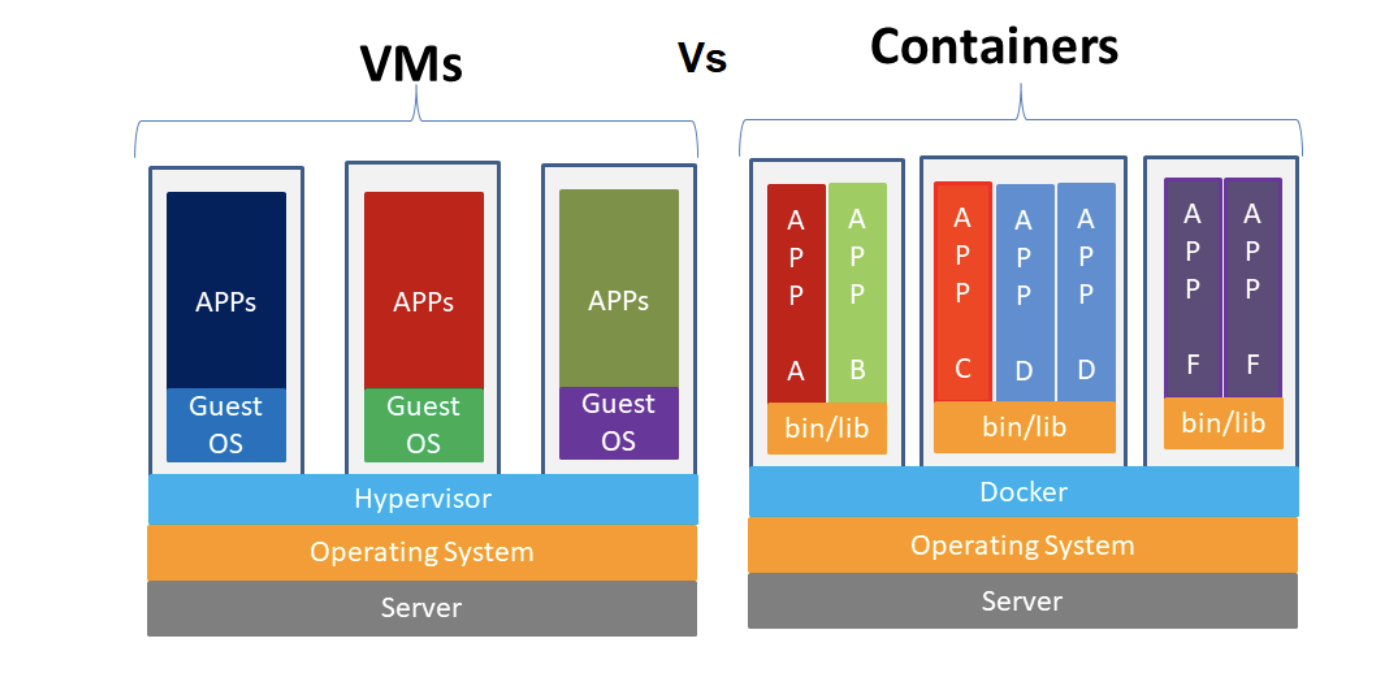
If you compare Containers versus virtual machines, the situation will be as follows. Docker with containers allows you to store different apps including their bins or libraries. There can be installed different frameworks like node.net, node js, etc. and you don’t need to care about the operating system which really impacts continuous delivery.
What’s about Azure?
So, we have Docker, we can containerize our apps and ship it somewhere. But where do we need to ship it? In our case, in a container registry. It allows you to build, store, and manage container images and artifacts in a private way for all types of container deployments. With the help of Azure Container Registry, you can make sure that your app will run correctly, it won’t shut down, and Microsoft will take care of the safety of the contents. Moreover, using registers you can build on demand, or fully automate builds with triggers such as source code commits and base image updates.
Azure container registers can be described as a car which can carry a lot of boxes delivering them in a stable and secure manner. Also, having images in the Azure container registry, you can push them to the web app containers. It can be Kubernetes services, simple app services in the Azure as well as just container instances in the Azure.
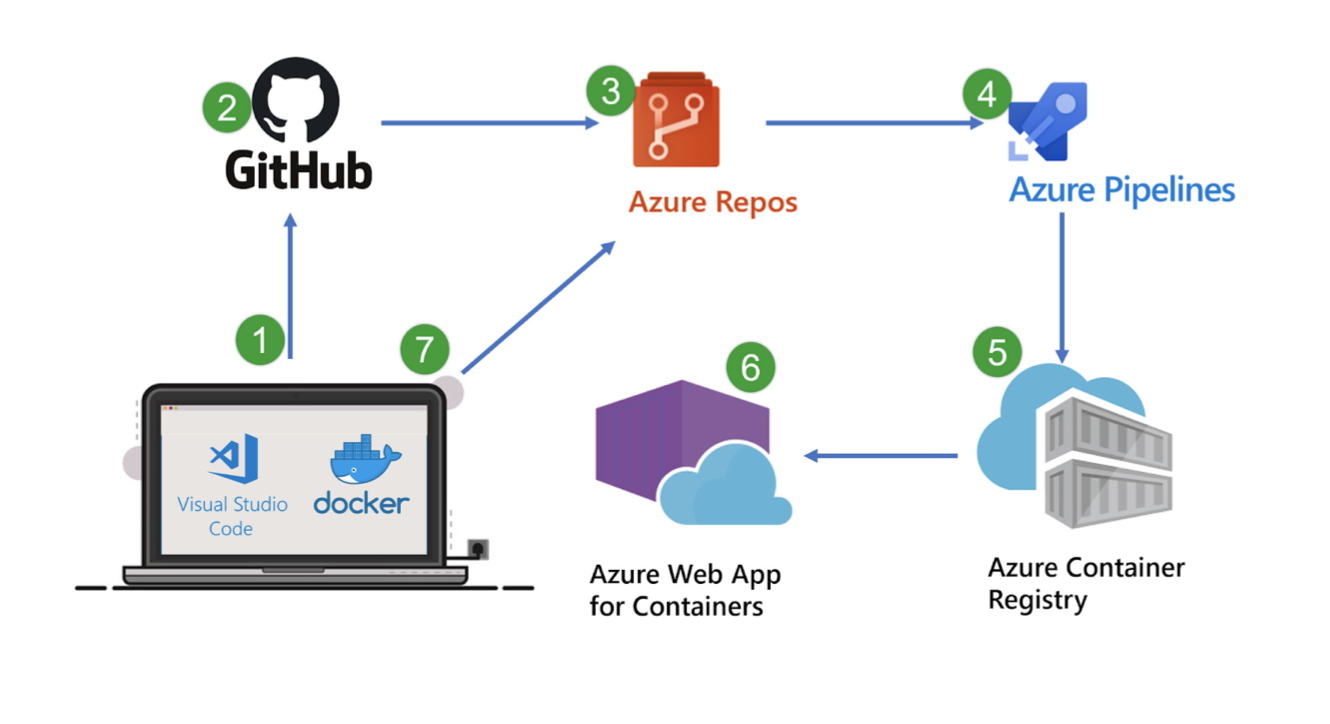
Typically, the Azure container register works in a simple way. For example, you have Visual Studio, containerize your app, and push it to Github where you have Azure repos. Configure Azure pipelines and get an image of your app in Azure container registry. If you need to make some changes in the app, you just need to rebuild the image of app and push it to the registry.
Typical use cases for using Azure container registry
Developers can push to a container registry as part of a container development workflow. For example, target a container registry from a continuous integration and delivery tool such as Azure Pipelines or Jenkins.
Configure ACR Tasks to automatically rebuild application images when their base images are updated, or automate image builds when your team commits code to a Git repository. You can create multi-step tasks to automate building, testing, and patching multiple container images in parallel in the cloud.
Azure provides tooling including Azure Command-Line Interface, Azure portal, and API support to manage your Azure container registries. Optionally install the Docker Extension for Visual Studio Code and the Azure Account extension to work with your Azure container registries. Pull and push images to an Azure container registry, or run ACR Tasks, all within Visual Studio Code.
Use Azure as a scalable orchestration system that manages containerized applications across clusters of hosts, including Kubernetes, DC/OS, and Docker Swarm.
Support building and running applications at scale with the help of Azure Kubernetes Service (AKS), App Service, Batch, Service Fabric, and others.
Know the benefits
Usually when working with clients, we at devspiration highlight several advantages of using Azure Container Registry.
Firstly, it’s registry service tiers. You can choose one of three subscription models with different options of webhook integration, registry authentication, delete functionality, or geo replication.
Security and access. Azure Container Registry transfers container images over HTTPS, and supports TLS to secure client connections.
Supported images and artifacts. Grouped in a repository, each image is a read-only snapshot of a Docker-compatible container. Azure container registries can include both Windows and Linux images. You control image names for all your container deployments.
Automated image builds. Azure Container Registry Tasks streamlines building, testing, pushing, and deploying images in Azure. For example, ACR Tasks can extend your development inner-loop to the cloud by offloading docker build operations to Azure.
Let’s test it!
Finally, let’s move to the coolest part and see how simple the process of containerization can be. We will consider it on the basic example which describes creation of our own Azure Container Registry and pushing the application as a docker image to it.
Step 1. Creation of Azure Container Registry
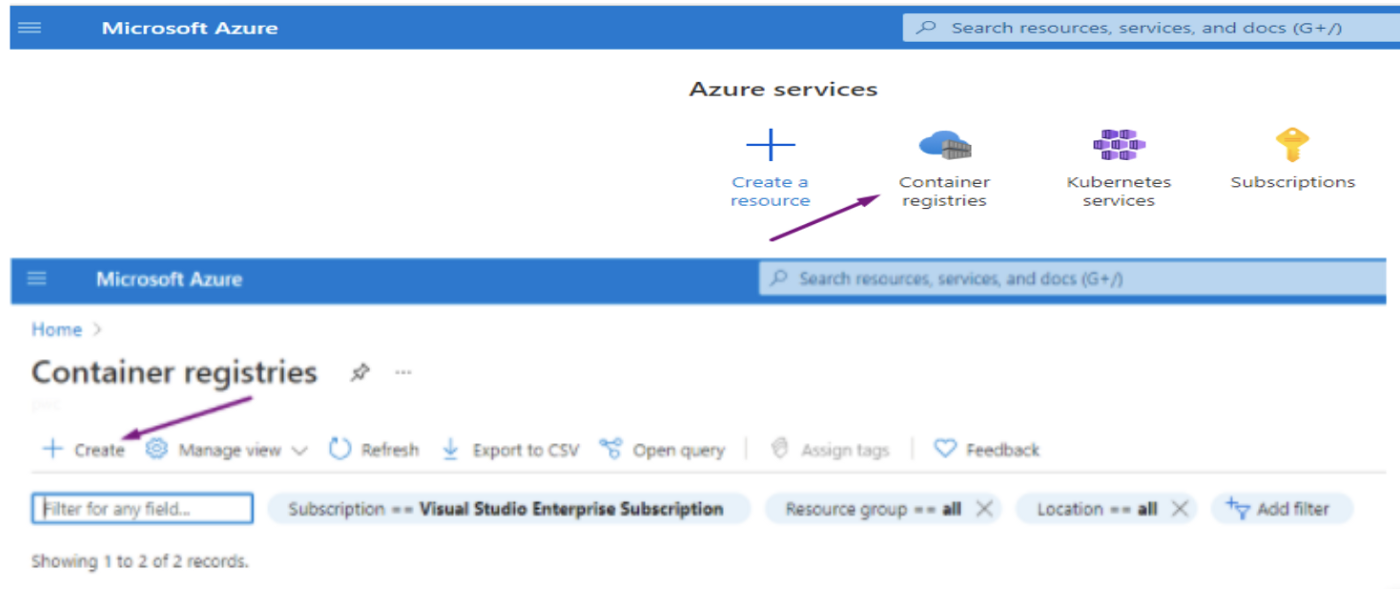
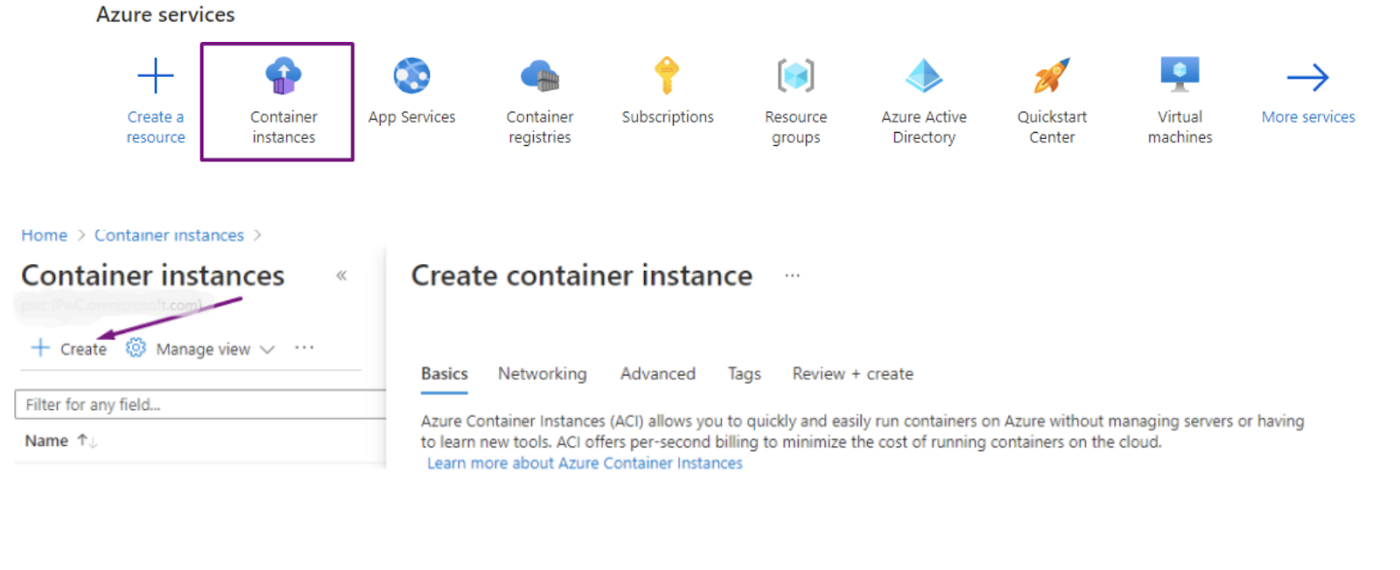
All starts with the Azure portal. Navigate to the container registry and just click on Create.

Choose the type of subscription, in our case it is Visual studio subscription. Create the source group. It is a place for helding our containers, apps, Azure functions, etc. Specify other details like registry name, location (in our case, it’s East USA), and select the SKU or service tier. After that you can customize network encryption. Pass the validation and you’ll see the basic info about your containers.
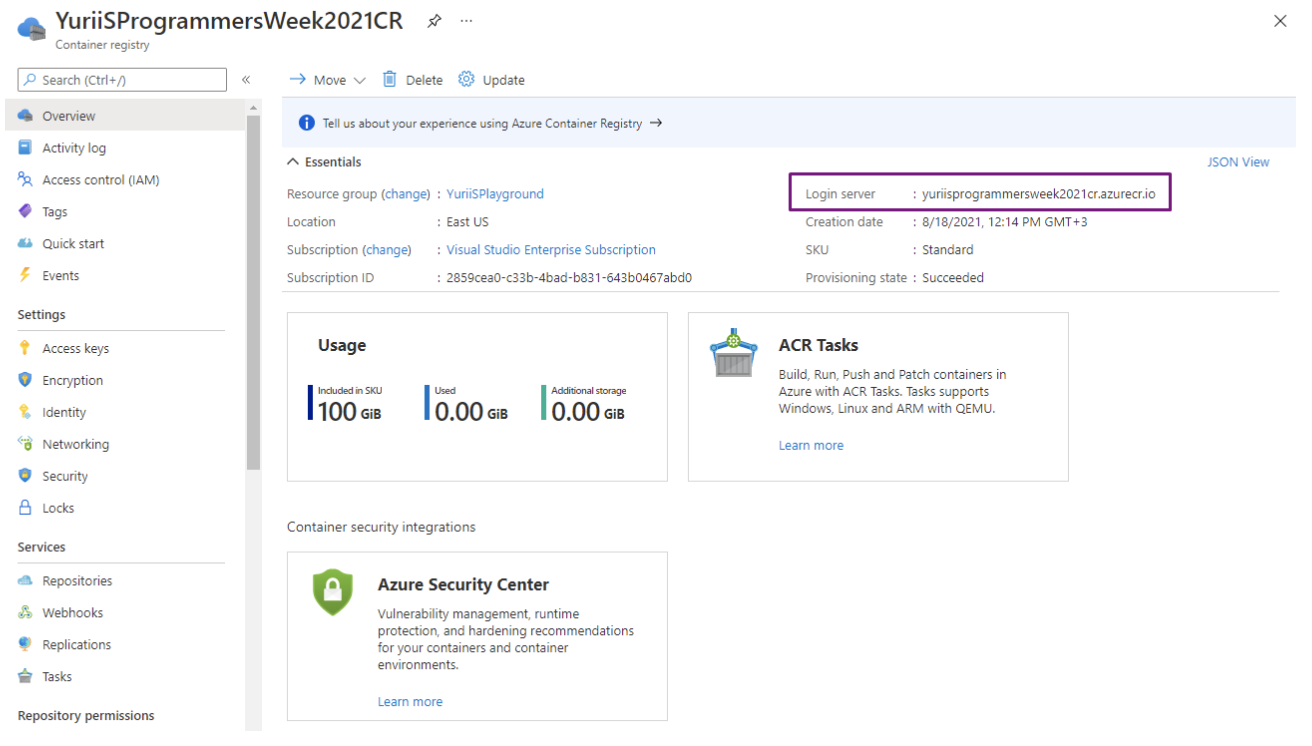
After that you can navigate back and see the login server for the Container registry. Using this address you can login to it from the local machine, Azure SLI on the web, and push your images.
Step 2. Prepare test app
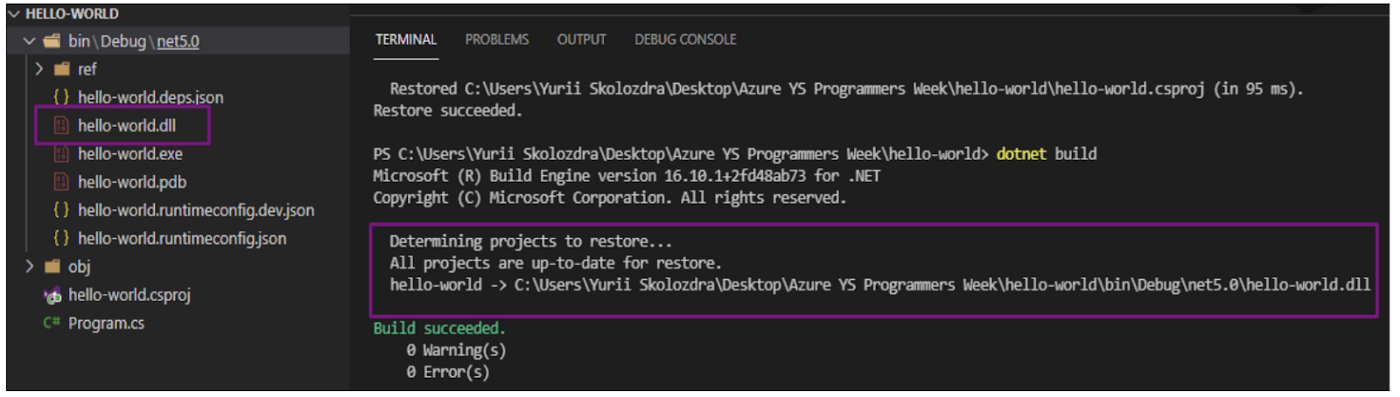
For the next step let’s create a simple application like Hello world. Open VS code, open terminal, run dotnet new console, and run dotnet build.
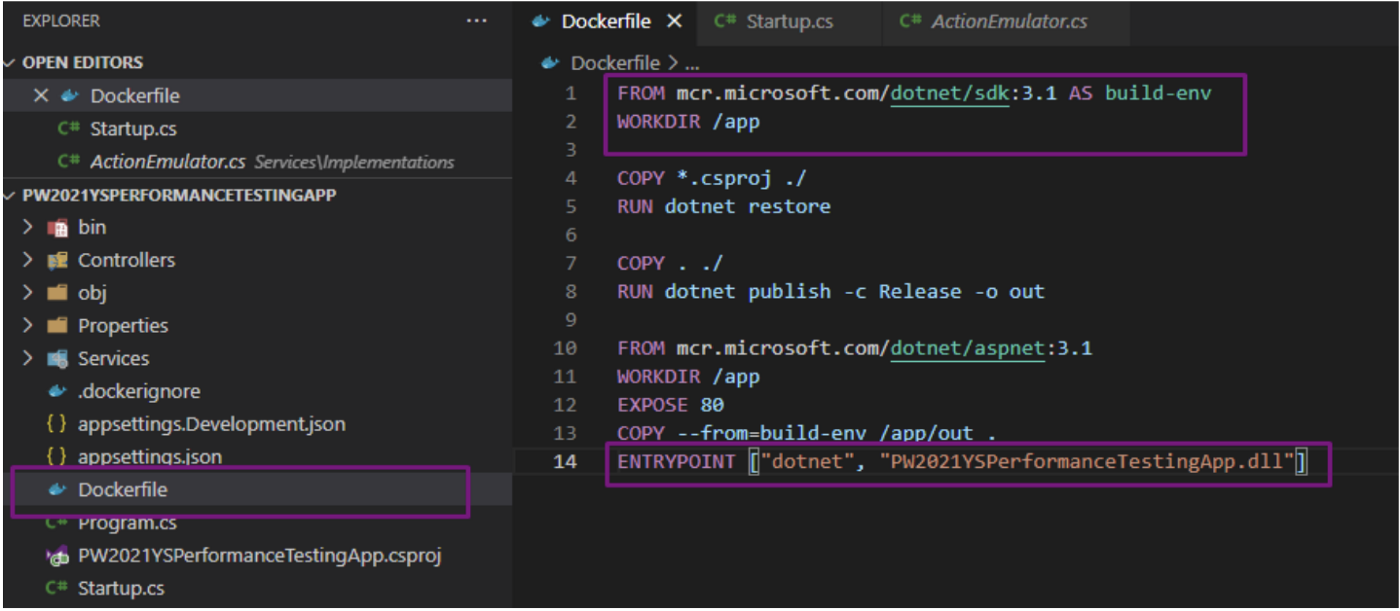
After a successful build you need to create a docker image. To do that, you need to install the docker on your local machine and Create dockerfile. In our case, the first two lines tell us about the key needed to run an application. It’s a build environment. Each application needs some framework, so locally in visual studio we have installed dotnet core framework, and it’s installed on our machine. In line 4 and 5 we’re setting our core project. Also we’re copying it to our folder and selecting APP as a work directory. In the end, which is also important, you need to set the entrypoint of your application. In our case with dotnet, we’re always dealing with DLL.
Step 3. Create an image
After creation of dockerfile and .dockerignorefile run the following command to build the docker image from your app folder:
docker build -t pw2021ysperformancetestingapp
After successful build the image should exist on your disk.

Step 4. Push docker image to Azure Container
First, login into Azure container registry. Remember about access keys which sometimes can be missed. In our case, we select the admin user and generate the password for testing purposes. In real case scenario it is used to manage the login to your container through the Azure Active Directory.
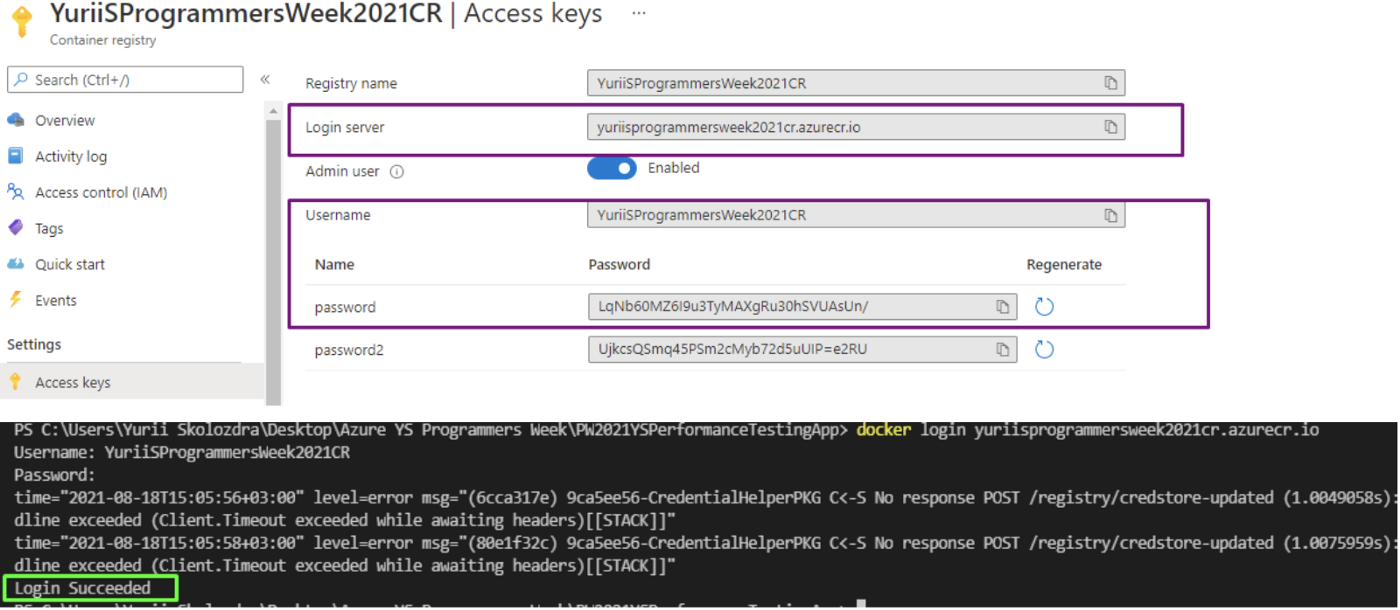
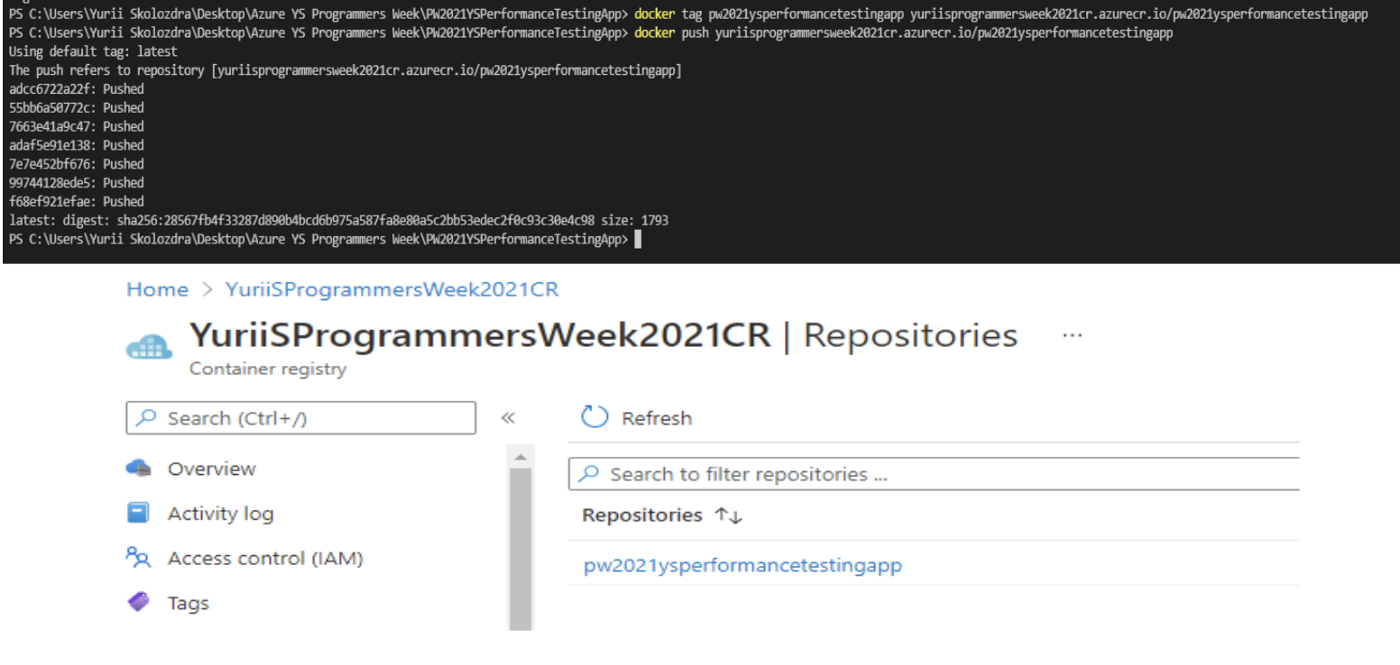
After successful login into the application, create a tag (association with the image) and push the docker image to the application. Image below shows the success of this process.
Step 5. Create Container instance
Now we can create a Container instance. It will run your app on Azure, based on the configuration of your container.
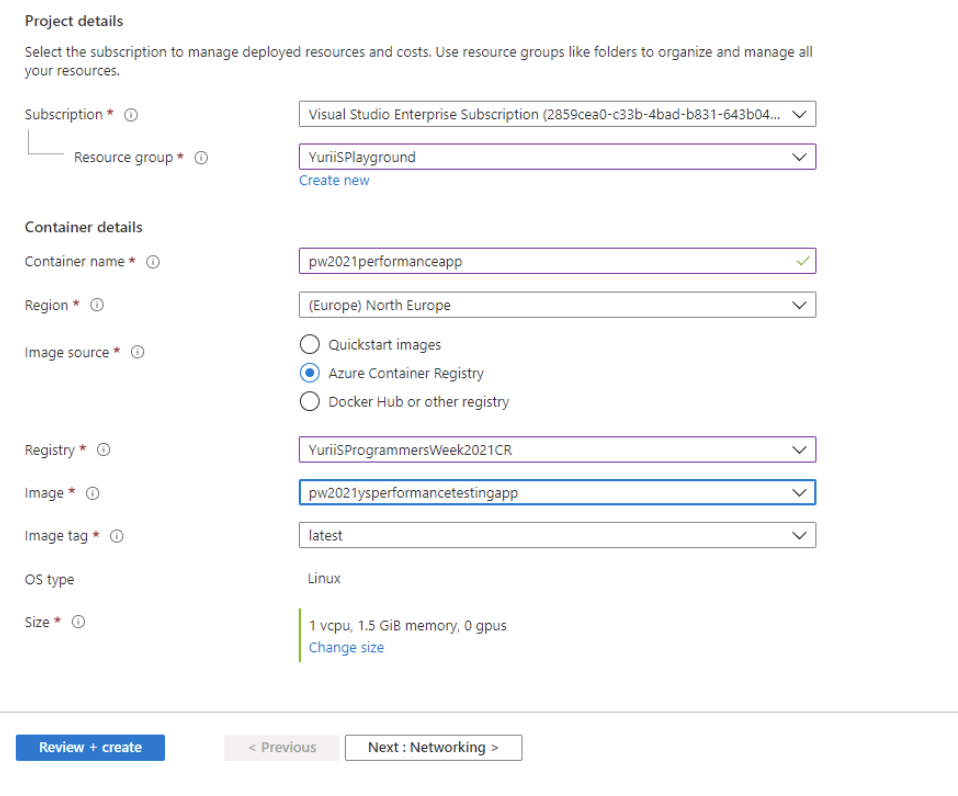
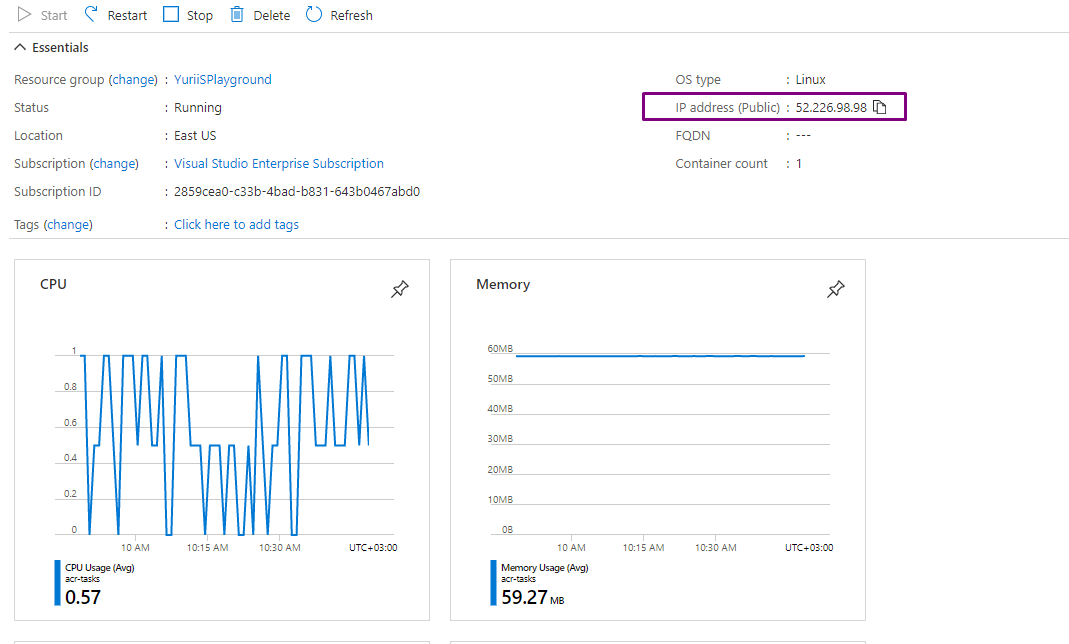
Configure all crucial parameters and get the IP address for your container. Use it to navigate to the app making sure that all is running correctly.
That’s all! Now we encourage you to try this process for yourself! In case of questions, don’t hesitate to drop us a line at the devspiration site.
Yurii Skolozdra
Software Engineer at devspiration

What Are AI Coding Harnesses?

Chat GPT: Tech Chat for Non-Techies (PM/QA/BA/PO etc)

Top 5 UX Trends of The Year: Importance, Benefits, Pitfalls

Angular vs. Blazor: Choosing the Right Framework

Azure App Configuration and Key Vault

How Processes Automation Transform Due Diligence?